How to Save Amazon Music to SD Card in 2025? Detailed Steps

In recent years, Amazon Music has emerged as one of the leading music streaming platforms, boasting over 82.2 million subscribers worldwide. With a vast library of more than 100 million songs, it offers everything from the latest hits to classic tracks that make it a favorite among music lovers.
However, many users often wonder how they can save their favorite songs for offline listening, especially when storage space on their devices is limited. One effective solution is to save music directly to an SD card. In this comprehensive post, we will guide you through the detailed steps to save Amazon Music to SD card in 2025. Whether you’re a long-time user or just getting started with Amazon Music, these straightforward instructions will help you make the most of your music experience.

How to Download Amazon Music to SD Card on Android
If you’re an Android user and want to save space on your device, downloading Amazon Music tracks directly to an SD card is a great solution. This process allows you to enjoy your favorite songs without worrying about running out of storage. The following is a step-by-step guide on how to do it.
Step 1: Change Storage Settings to SD Card
First, you need to set the Amazon Music app to save downloads directly to your SD card. Here’s how to save Amazon Music on a SD card:
1. Open the Amazon Music App
Launch the Amazon Music app on your Android device.
2. Go to “My Music”
At the bottom of the screen, tap on “My Music”.
3. Access Settings
Look for “Settings” in the list and tap on it.
4. Select Storage
In the Settings menu, find and select “Storage”.
5. Change Save Location
Tap on “Save to” and change the default path from device storage to your SD card. Here, you can also check the SD card’s status and see how much space is available.
Step 2: Download Music to Your SD Card
After you’ve set the storage location, you can download your favorite tracks directly to the SD card. Follow these steps:
1. Find Your Desired Song
Browse through your music library to locate the song you want to download.
2. Download the Track
Next to the song title, tap the three dots (menu icon) and select “Download”. The song will now be downloaded and saved directly to your SD card.
Step 3: Play Songs Saved on Your SD Card
Once you’ve downloaded your music, you can easily access and play it within the Amazon Music app. Here’s how:
1. Go to Your Account Profile
Tap on your account profile icon located in the top-right corner of the app.
2. Open Settings
From your profile menu, select “Settings”.
3. Manage Your Music
In the Settings menu, find and choose “Music Management”.
4. Import Music from SD Card
Look for the option labeled “Automatically Import Music From”. Tap on “Select Folder” and navigate to the folder on your SD card where your music is stored. This will allow the app to import your downloaded Amazon songs into your library.
How to Download Amazon Music to SD Card on Any Devices
Now that you’ve learned how to download Amazon Music to SD card on your Android device, you may want to enjoy your favorite tracks across different devices. To do this, you’ll need to bypass some of the restrictions placed by the Amazon Music platform. In this section, we will guide you on how to download Amazon Music on your PC or Mac and then transfer it to your SD card. This way, you can enjoy your music anywhere you go.
Download Any Song/Playlist from Amazon Music Effortlessly
To make the process of downloading music from Amazon Prime simple and efficient, we recommend using iDownerGo. This powerful music downloader allows you to easily download your favorite songs from Amazon Music in high quality and various formats. iDownerGo supports a wide range of audio formats, including MP3, FLAC, AAC, and WAV. You can choose the format that suits your needs best, ensuring compatibility with any device you plan to use.
If you want to download Amazon Music and save it to your SD card, iDownerGo is an excellent tool that makes this process simple and efficient. It allows you to download songs in various formats without compromising sound quality. Below are the detailed steps to help you download songs or playlists from Amazon Music using iDownerGo.
Step 1: Choose Output Format and Quality
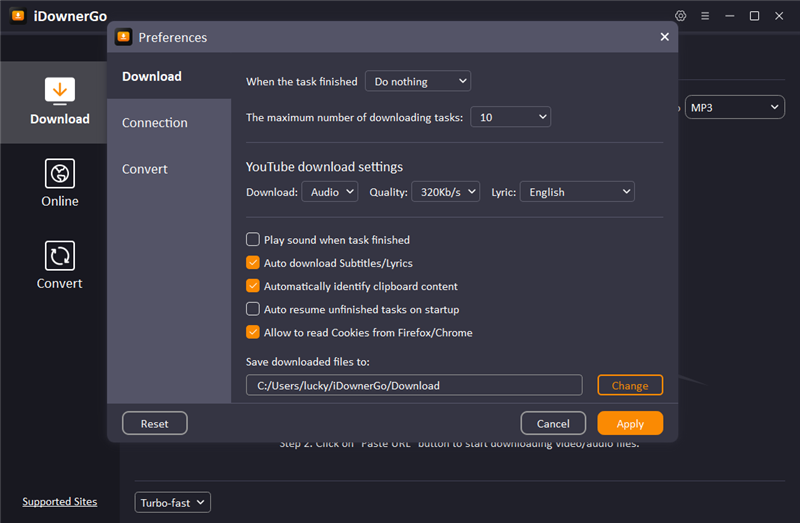
Hover your mouse over the “Download then Convert to MP4” tab. Click on the MP4 option to open a drop-down list of available formats.
Choose the format you want for your downloads with options include MP3, M4A, WAV, AAC, FLAC, OGG, AIFF, and MKA. To set the audio quality, click on the gear icon to enter the settings panel. Here, you can select your desired audio quality, with options available up to 320 kbps.
Step 2: Launch iDownerGo and Access Amazon Music
You can begin the process by launching the iDownerGo program on your computer and click on the “Online” module within the application. In the search bar, enter the URL: https://music.amazon.com/. This will take you to the Amazon Music website.
Sign in to your Amazon Music account using your credentials. Once logged in, you can search for the songs or playlists you wish to download.

Step 3: Copy the URL of the Target Song
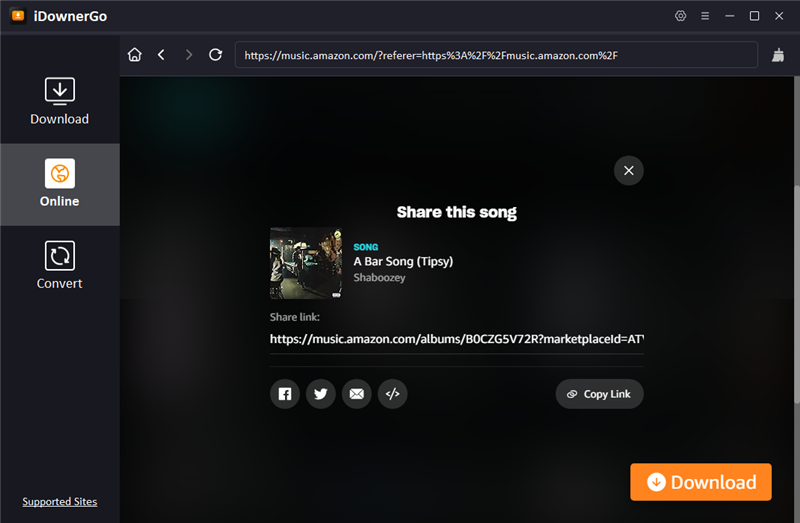
After that, navigate to the song you want to download on Amazon Music. Click on the “Share this song” option and then hit the “Copy Link” button. This will copy the URL of the song to your clipboard.
Step 4: Start the Download
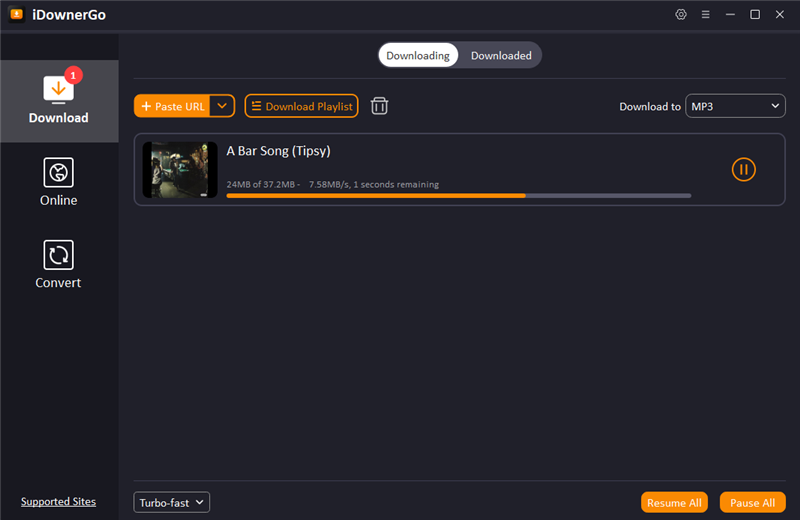
In the next step, you will need to return to the iDownerGo application. In the “Downloading” module, click on the “Paste URL” button. iDownerGo will automatically start downloading the song.
Step 5: Check Your Downloaded Music
Once the download is complete, navigate to the “Downloaded” module within the iDownerGo application. Check to ensure that your music file has been saved correctly and is ready for use.
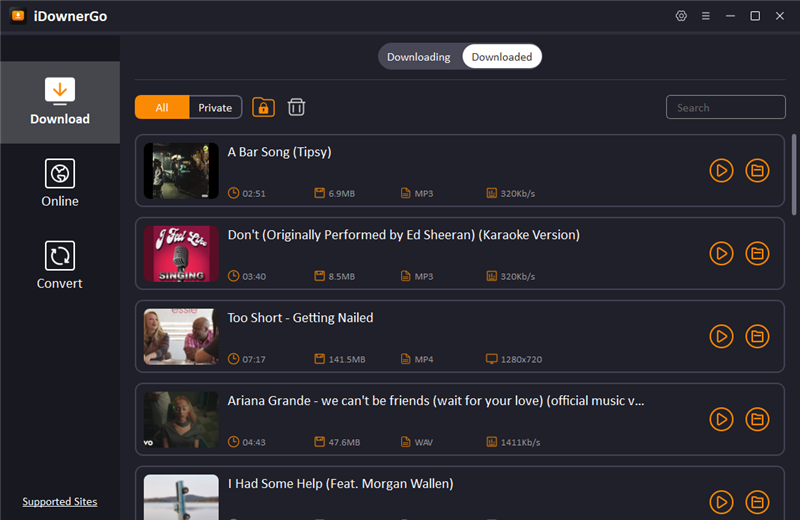
With these steps, you can easily download your favorite Amazon Music tracks using iDownerGo. After downloading, you can transfer the files to your SD card for easy access on any device.
Related Reading
3 Free Ways to Download Amazon Product Video on Laptop
Transfer Downloaded Music to SD Card
Once you’ve successfully downloaded your favorite music tracks, the next step is transferring them to an SD card for easy access on your devices. Whether you’re using a Windows PC or a Mac, the process is straightforward. Follow the steps below to move your music files to an SD card.
✔️ Make sure to plug your SD card into your computer’s SD card slot or use an SD-to-USB adapter if your computer doesn’t have a dedicated slot.
✔️ Always eject your SD card properly from your computer before removing it to avoid data corruption.
Insert your SD card into the appropriate slot on your computer. If your computer lacks an SD card slot, use an SD-to-USB adapter.Click the Windows Start button (the Windows logo) in the bottom-left corner of your screen. Select “File Explorer” from the menu.
Step 2: Locate Your Music
Navigate to the folder where your downloaded music files are stored. This could be in your “Music” folder, within “Documents” or wherever you saved them.
Step 3: Select the Music Files
Click and drag your mouse to highlight the music files you want to transfer. Alternatively, hold the Ctrl key and click on individual files to select them. You can also press Ctrl + A to select all files in the folder.
Step 4: Copy or Move the Files
Click on the “Home” tab in the File Explorer. You will see options for “Copy to” or “Move to”.
* Copy: Creates a duplicate of the files on your SD card while keeping the originals on your computer.
* Move: Transfers the original files to the SD card and deletes them from your computer.
Step 5: Choose the SD Card as the Destination
Select “Choose location” from the drop-down menu, scroll down, and click on your SD card’s name under “This PC” or “My Computer”.
Step 6: Complete the Transfer
Click “Copy” or “Move” based on your selection in Step 5. The transfer process will start, and you can monitor the progress.
Once the transfer is complete, click the USB icon in the bottom-right corner of your screen and select “Eject [Your SD Card Name].” After it’s safe to remove, unplug the SD card from your computer.
Insert your SD card into the built-in slot or use an SD-to-USB adapter if necessary. Click on the Finder icon (a blue face) in your Dock to open a new Finder window.
Step 2: Access Your Music Files
Navigate to the folder where your downloaded music is stored. If you’re unsure, check “All My Files” to locate them.
Step 3: Select and Copy the Music Files
Click and drag across the files you want to transfer, or hold the Command (⌘) key while clicking on individual files to select them. Go to the “Edit” menu at the top of your screen and select “Copy.”
Step 4: Open Your SD Card
Find your SD card’s name listed under the “Devices” section on the left sidebar of the Finder window. Click it to open the SD card window.
Step 5: Paste the Music Files
Go back to the “Edit” menu and select “Paste Items.” This will begin copying your selected music files to the SD card.
Step 6: Eject Your SD Card
Once the transfer is finished, click the eject icon next to your SD card’s name in the Finder sidebar. After it disappears, you can safely remove the SD card from your Mac.
FAQs About Amazon Music to SD Card
Q1: How to Fix the “Download Failed” Issue?
If you’re experiencing a “Download Failed” issue when trying to download Amazon Music to your SD card, here are some steps you can take to resolve it:
✔️ Check Your Amazon Music Subscription: Ensure that you have an active subscription to Amazon Music Unlimited or Prime Music. Remember, these titles are only accessible within the Amazon Music app and cannot be exported to other apps or devices.
✔️ Ensure You’re Downloading Correctly: To download a song, album, or playlist, select the music you want, tap the More Options menu, and then tap “Download”. Make sure to follow these steps carefully.
✔️ Verify Your Internet Connection: A stable internet connection is necessary for downloading music. If your connection is weak or intermittent, the download may fail.
✔️ Check Storage Space: Make sure your SD card has enough storage space available. If it’s full, you may need to delete some files or transfer them elsewhere to make room for your music downloads.
✔️ Set Download Location: Ensure that your SD card is set as the download location in the Amazon Music app settings. This will allow your music to be saved directly to the SD card.
✔️ Clear the App Cache: Sometimes, clearing the app cache can help resolve download issues. You can do this through your device settings by finding the Amazon Music app and selecting the option to clear its cache.
✔️ Restart Your Device: A simple restart can sometimes fix temporary glitches that may be causing download failures.
✔️ Reinstall the App: If the issue persists, consider uninstalling and reinstalling the Amazon Music app. This can help reset any settings that might be causing problems.
Remember, Prime Music and Amazon Music Unlimited songs can only be used within the Amazon Music app, and you cannot copy them to CDs or other external storage devices. If you continue to encounter issues, don’t hesitate to reach out to Amazon support for further assistance.
Q2: How to Fix the “Your SD Card is Offline” Issue?
If you’re facing the “Your SD Card is Offline” issue while using the Amazon Music app, here are some steps to help you resolve it:
✔️ Restart Your Device: Sometimes, simply restarting your device can fix temporary issues with the SD card. Power it off, wait a few seconds, and then turn it back on.
✔️ Check the SD Card Connection: Make sure the SD card is properly inserted into your device. If it seems loose, remove it and reinsert it carefully.
✔️ Unmount and Remount the SD Card: Go to your device settings, find the storage section, and unmount the SD card. After that, power cycle your device and remount the SD card. This can help the system recognize the card again.
Q3: Will the Quality of Music be Damaged If I Transfer Amazon Music to An SD Card?
No, the quality of your music will not be damaged if you transfer Amazon Music to an SD card. When you download music from Amazon Music, it is stored in a format that maintains its quality.
However, it’s important to note that the original music files should be in lossless quality. This means that the files retain all the original audio details and clarity. If you download high-quality tracks, they will remain high quality when stored on your SD card.
Just make sure to follow the proper steps for downloading and storing your music to ensure that everything works smoothly.
In Summary
Downloading Amazon Music to your SD card can enhance your listening experience by allowing you to access your favorite songs offline. We’ve discussed the detailed steps and common issues you may encounter to download Amazon Music to SD card, such as download failures and SD card recognition problems, along with effective solutions to fix them. Remember, the quality of your music will remain intact when stored properly, ensuring you enjoy the best audio experience.
If you’re looking for a more flexible way to download Amazon Music to your SD card without limitations, we recommend using iDownerGo. This tool provides a straightforward method for how to download Music to a SD card on any device, giving you greater control over your music library. Enjoy your music wherever you go, hassle-free!- How to Download Instagram Videos & Reels to MP3 Audio Format: 3 Best Methods
- How to Download Let Me Love You Song in MP3 from SoundCloud/Pagalworld
- 3 Best Ways to Download BBC Sounds to MP3 for Free
- 3 Best Ways to Download Myspace Music for Free
- [100% Work] 9 Ways to Fix Spotify Keep Pausing Problem


