Getting Start of iDownerGo Video Downloader – User Guide
iDownerGo Video Downloader is a powerful tool designed for downloading videos from a wide array of websites. With support for over 10,000 sites and the ability to download videos in HD and up to 8K resolution, iDownerGo offers features that cater to both casual users and professionals. This guide will walk you through the installation, use, and advanced features of iDownerGo to help you get the most out of your video downloading experience.
Download and Install iDownerGo Video Downloader
Step 1 Visit the Official Website
Go to iDownerGo’s official website to download the installer for your operating system.
Step 2 Download the Installer
Click on the download button suitable for your OS (Windows, macOS, etc.). The file will be downloaded to your computer.
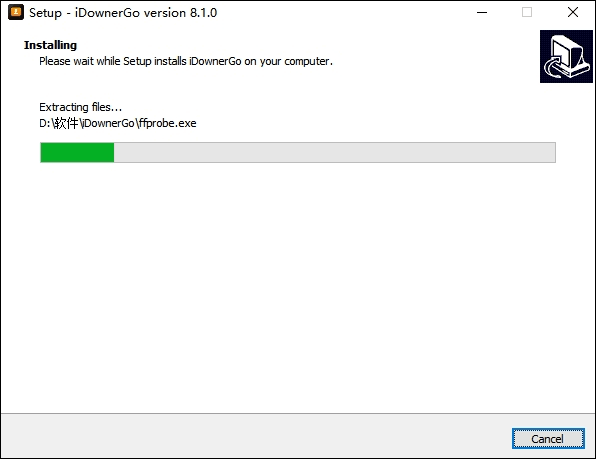
Step 3 Install iDownerGo
Open the downloaded file and follow the on-screen instructions to install iDownerGo on your device. The installation process is straightforward and typically involves agreeing to the terms of service and selecting an installation directory.
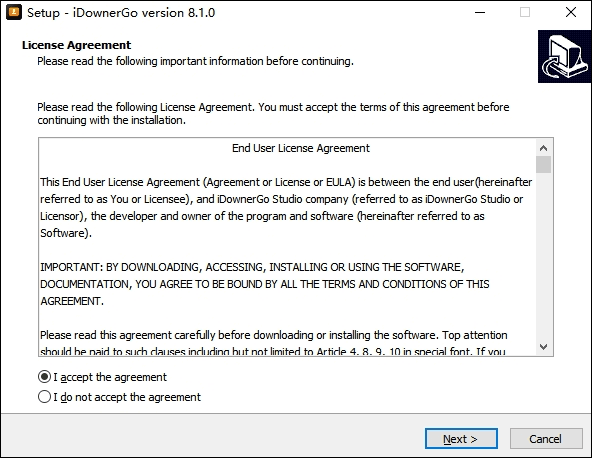
Step 4 Launch the Application
Once installed, open iDownerGo from your applications folder or desktop shortcut.
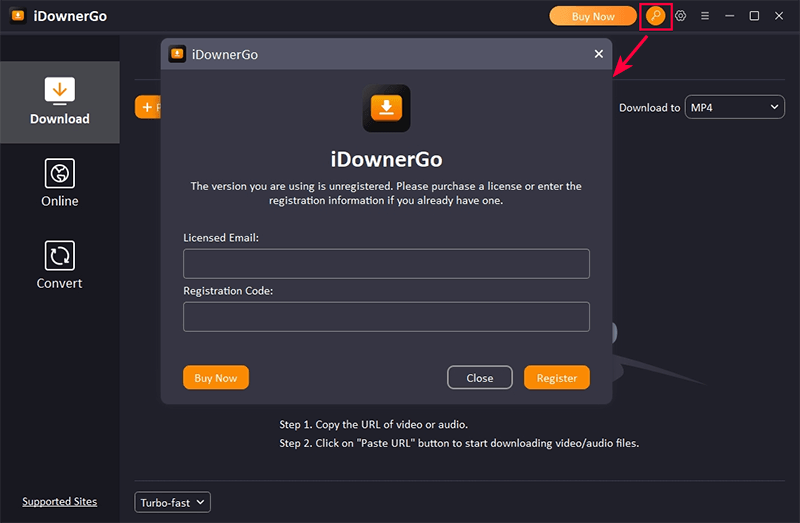
With the free trial version of the iDownerGo Video Downloader, you only have limited number of downloads. If you want to enjoy the full function of this software, then you have to register your account first.
If you already have a license code, then click on the “Register” button on the top of the interface to enter the registration window.
How to Use the iDownerGo Download Function
- 1. How to Download Video from YouTube
- 2. How to Download Multiple Videos
- 3. How to Download Playlist from YouTube, Bilibili
How to Download Video from YouTube
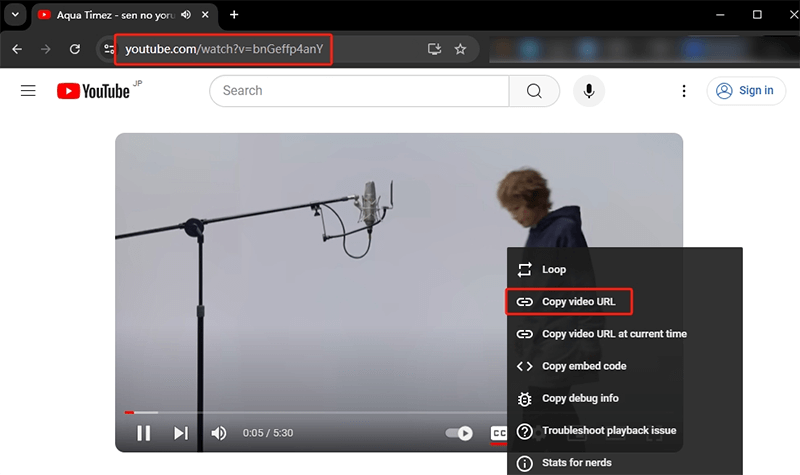
Step 1 Copy the YouTube Video URL
To download a video from YouTube, start by navigating to YouTube.com and locating the video you want to download. Once you’ve selected the video, copy its URL from the address bar at the top of your browser.
Step 2 Set the Output Format
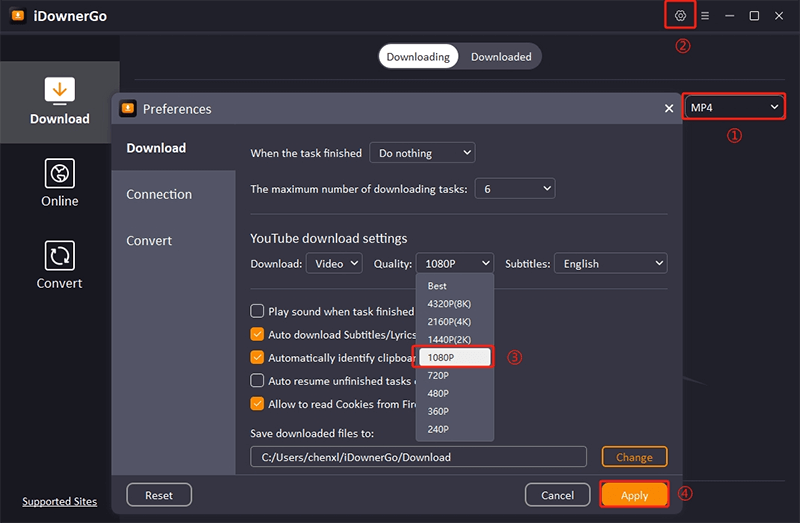
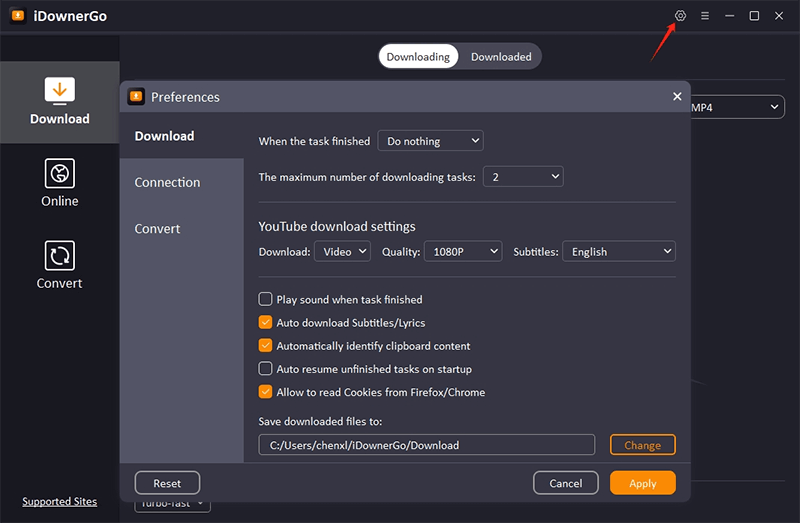
Next, choose the format and quality for your download. Click the “Settings” button in the top right corner of the iDownerGo interface. In the Preferences window, go to the “Download” section. Here, you can select whether you want the file as video or audio, pick the quality, and choose where to save it. Videos are saved as MP4 by default. To convert the file to a different format, select the “Download to” option.
Step 3 Paste the Copied URL
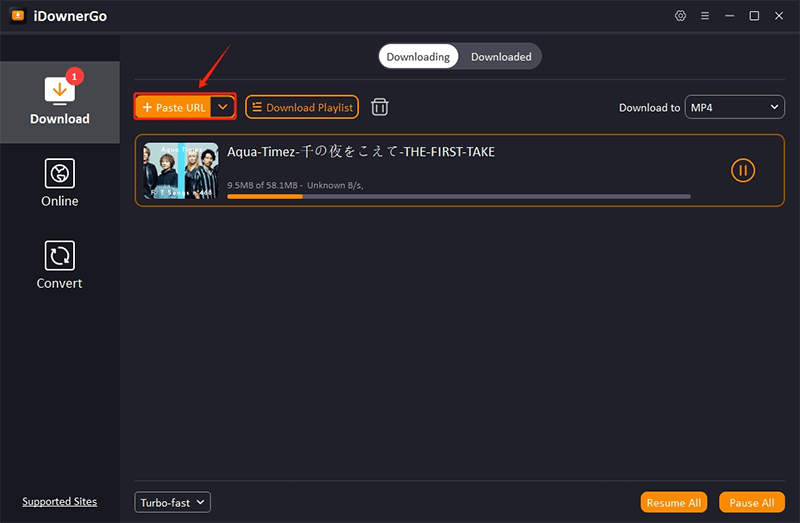
In iDownerGo Video Downloader, you don’t need to manually paste the video URL. Simply click the “Paste URL” button, and the software will automatically analyze the video.
Step 4 Download the YouTube Video
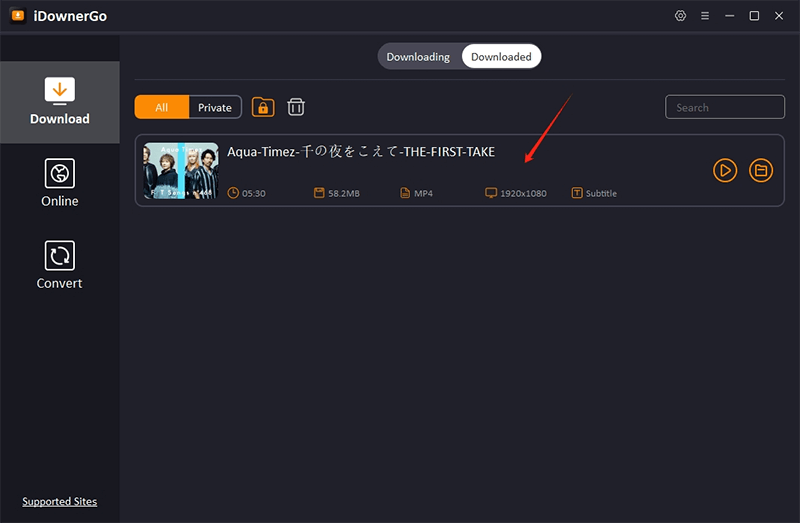
After the analysis is complete, the download will start automatically. The video will be saved to your computer once the download finishes. You can access the downloaded files in the “Downloaded” section of the software.
How to Download Multiple Videos
If you need to download multiple videos at once, follow these steps:
Step 1 Open the Batch Download Option
In iDownerGo Video Downloader, locate the drop-down menu next to the “Paste URL” button.
Step 2 Select “Multiple URLs”
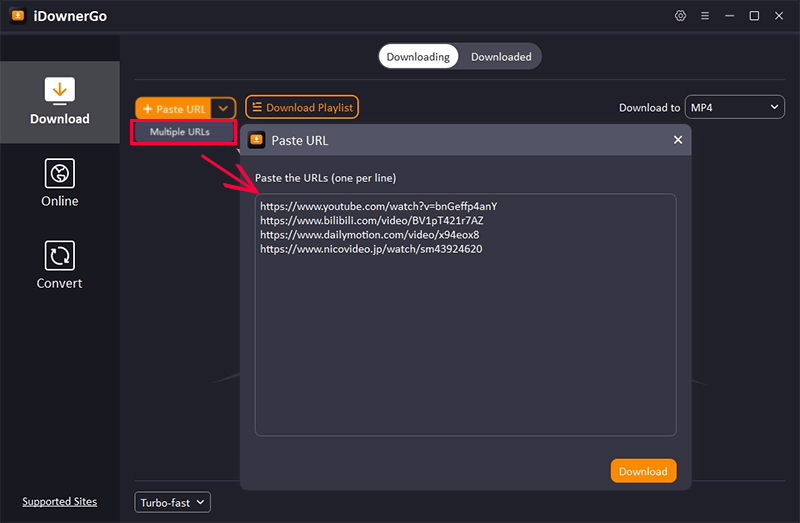
Click on the drop-down menu next to the “Paste URL” button and select the “Multiple URLs” option. This will open a field where you can enter more than one video URL at once. You can then paste multiple URLs into this field, each on a new line, to initiate the batch download process.
Step 3 Paste Multiple Video URLs
A blank text box will appear. Copy the URLs of the videos you want to download from your browser and paste them into this box. You can paste multiple URLs by placing each one on a new line. This allows you to input as many video links as needed for batch downloading.
Step 4 Start the Download Process
After pasting all the URLs, click the “Download” button. iDownerGo will begin downloading all the videos simultaneously.
How to Download Playlist from YouTube, Bilibili
Step 1 Copy the Playlist URL
To download a playlist from YouTube, Bilibili, or Dailymotion, start by visiting the site and locating the playlist you wish to download. Copy the playlist’s URL from the address bar of your browser.
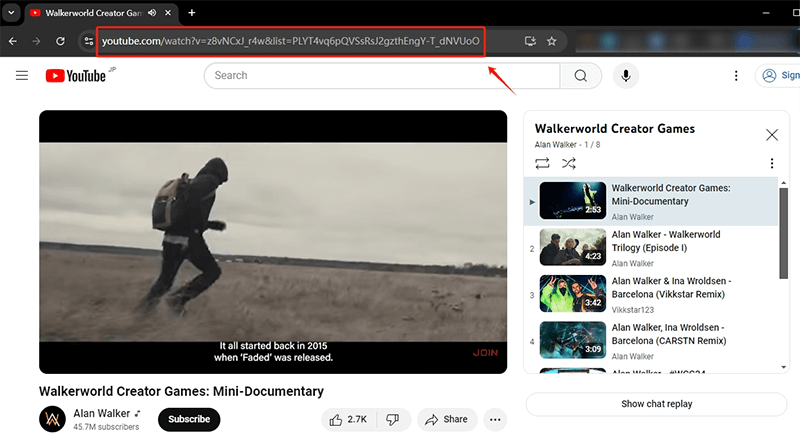
Step 2 Paste the Playlist URL into iDownerGo
Open iDownerGo Video Downloader. If you’re downloading from YouTube, just paste the playlist URL into the input field, and iDownerGo will automatically find and analyze it. For Bilibili, first select “Download Playlist” from the drop-down menu before pasting the URL.
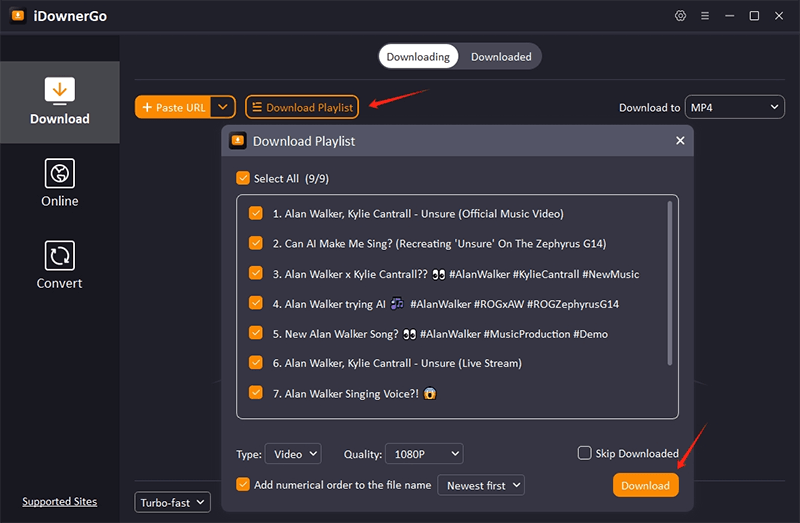
Step 3 Select Videos and Set Output Options
After iDownerGo analyzes the playlist, a window will appear showing all the videos in the playlist. You can choose which specific videos to download or select the option to download the entire playlist. You can also pick the output format (such as MP4 or MP3) and set the quality for the video or audio. If you want the files to be named in numerical order, make sure to check the option for that.
Step 4 Confirm and Download
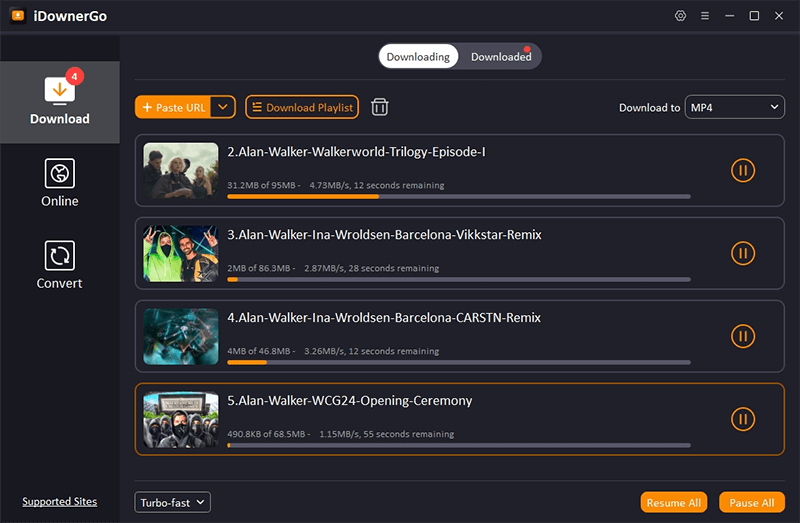
After making your selections, click the “OK” button to confirm your settings. iDownerGo will start downloading the videos, and they will be saved to the folder you specified.
How to Use iDownerGo Online Function
1. How to Download Videos Online
Step 1 Access the Online Section
Open iDownerGo Video Downloader and click the “Online” option on the left side. Select the website you want to download from, like YouTube, or enter a URL into the built-in browser.
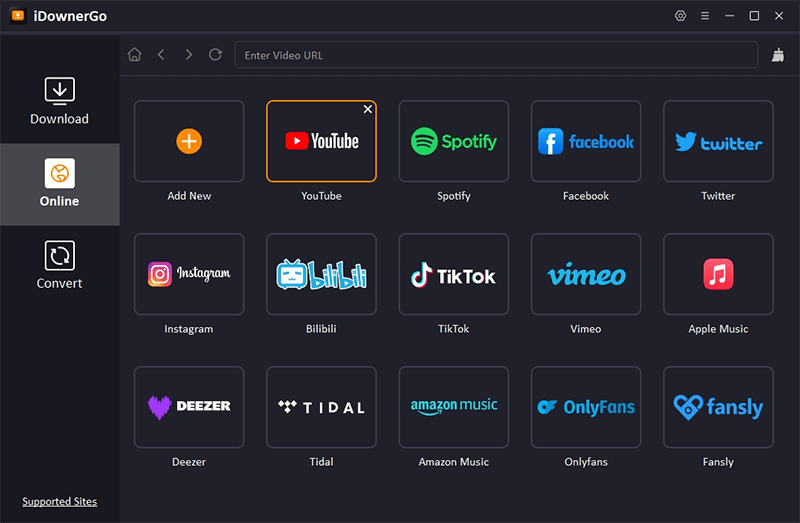
Step 2 Set Output Format and Quality
Go to the “Downloading” tab, choose the output format, and set the video quality. Adjust subtitle settings if necessary, and then click “Apply”.
Step 3 Find and Download the Video
Find the video you want to download in the online section. Click the red “Download” button below the video or the orange “Download” button while the video is playing.
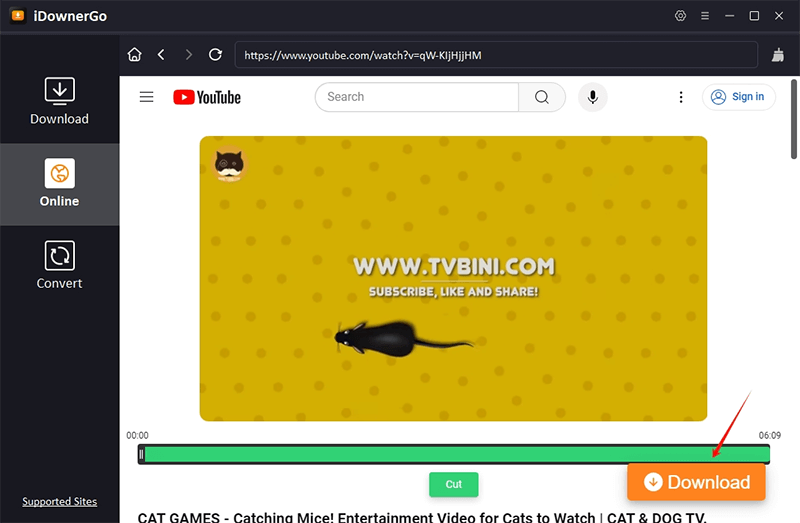
Step 4 Complete the Download
The download will begin automatically. You can monitor its progress in the “Downloading” section and find the finished file in the “Downloaded” section.
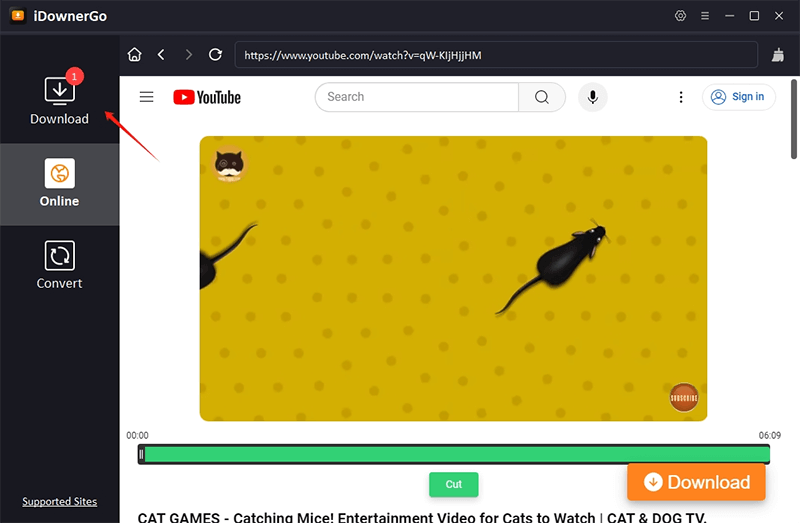
2. How to Crop Video from YouTube Online
If you want to trim a YouTube video to keep only the important parts, you can use iDownerGo’s online function. This feature works only for YouTube videos.
Step 1 Play the YouTube Video
In the Online Section of iDownerGo, use the built-in browser to navigate to YouTube and play the video you want to trim. This will allow you to view the video directly within iDownerGo.
Step 2 Set the Time Duration
As the video plays, use the green bars on the progress bar to set the start and end points of the segment you want to keep. Adjust these bars to choose the exact portion of the video you wish to trim.
Step 3 Crop the Video
Click the red “Cut” button to trim the video to the selected portion you’ve marked.
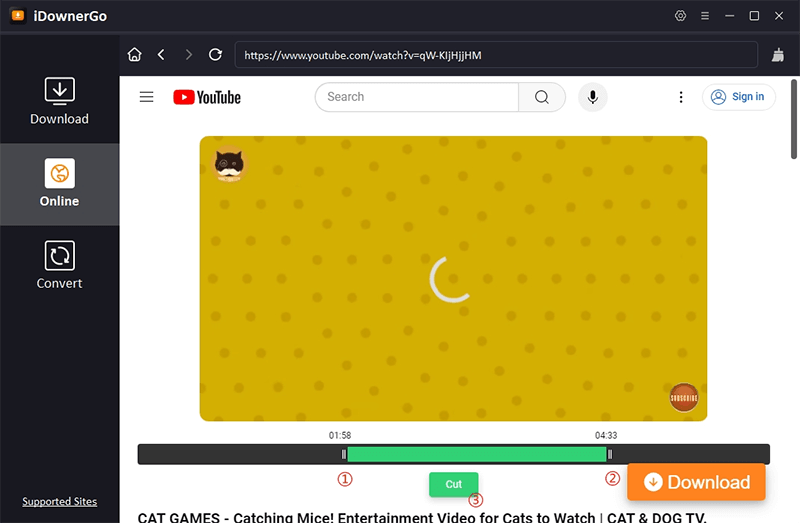
Step 4 Download the Cropped Video
The trimmed portion will automatically download and will be available in the “Downloaded” section once it’s finished.
How to Use iDownerGo Convert Function
Step 1 Add a File
Click the “+” button to upload your audio or video file from your computer to iDownerGo.

Step 2 Choose Format and Quality
After adding the file, click “Convert.” A window will pop up where you can choose your desired output format (like MP4 or MP3) and quality. For video, select the resolution you want, such as HD or 4K. For audio, choose the quality you prefer. If you want to mute the audio, select the “Mute” option. Once you’ve made your choices, click “OK” to start the conversion.
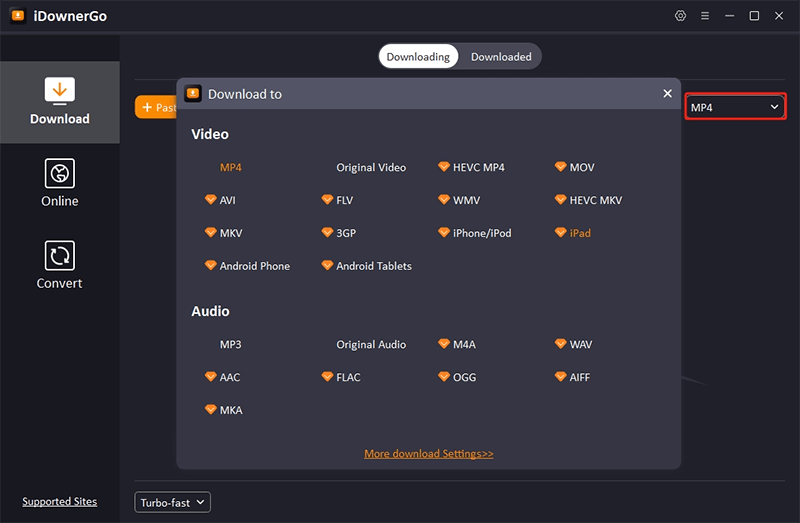
Step 3 Finish Conversion
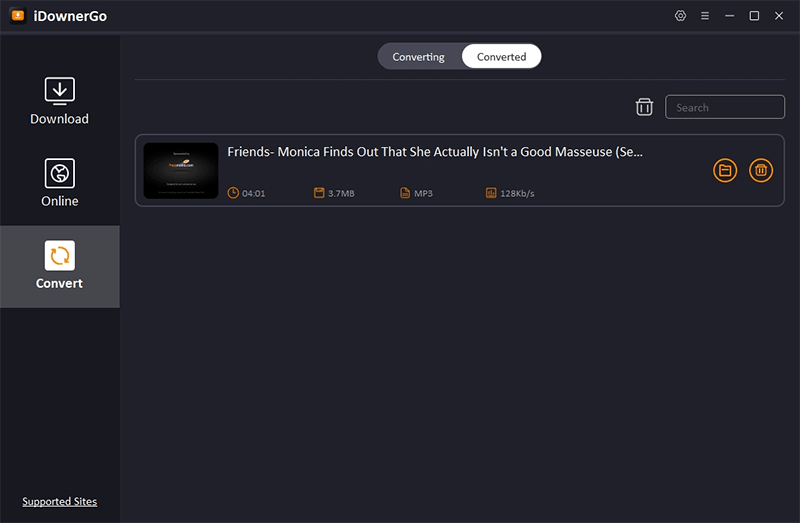
When the conversion is finished, the file will be saved to the location you chose. You can also find the converted file in the “Converted” section of the software.
Understand the Basics
1. Preferences
In the Preference Option, you can adjust the following settings:
- Maximum Download Tasks: Set the number of simultaneous downloads to boost efficiency.
- Output Format: Choose whether you want the output as video or audio.
- Quality: Select the video resolution or audio quality.
- Destination Location: Change where the downloaded files will be saved.
- Additional Settings: Enable options like “Auto Download Subtitles” and “Auto Resume Unfinished Tasks” as needed.
- Private Videos: For downloading private videos from Facebook or Instagram, make sure to select “Allow to read Cookies from Firefox/Chrome” before starting.
2. Turn on Turbo-fast Mode
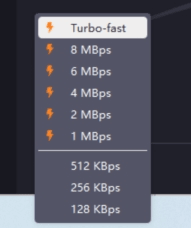
Turbo-fast Mode is the default speed for downloads in the software. You can adjust the download speed to your preference by selecting a different mode in the lower left corner of the interface or through the Preferences option.
In the Preferences under Connection Options, you can also use an in-app proxy. To set this up, check the “Enable proxy” box and enter your HTTP proxy details, including port, account, and password.
3. Pause or Resume the Downloading Files
In iDownerGo, you can pause a download by clicking the “Pause” button. To stop all downloads at once, click the “Pause All” button in the top-right corner. If you want to continue downloading, just click the “Resume” button.
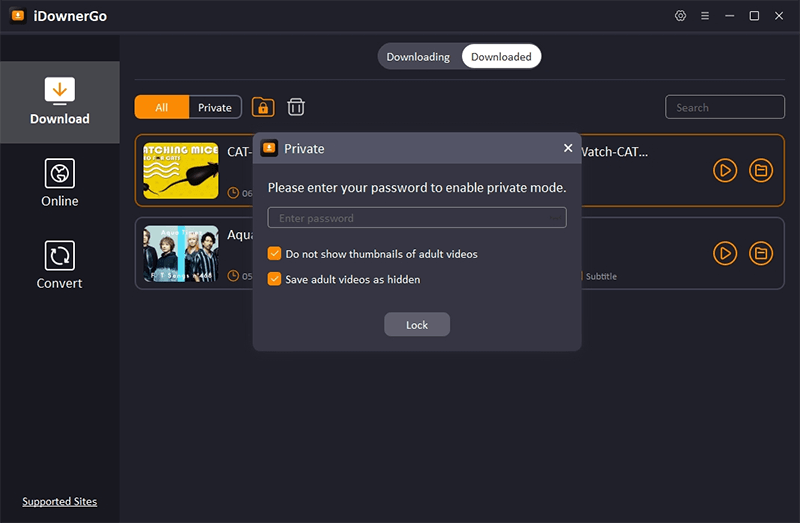
4. Protect Your Video Privacy
iDownerGo offers a private video mode to keep your videos and music files secure in a password-protected folder.
- To move a video to this private folder, go to the “Downloaded” section and right-click on the video you want to protect. Select “Move to Private List” from the options, and a new window will appear.
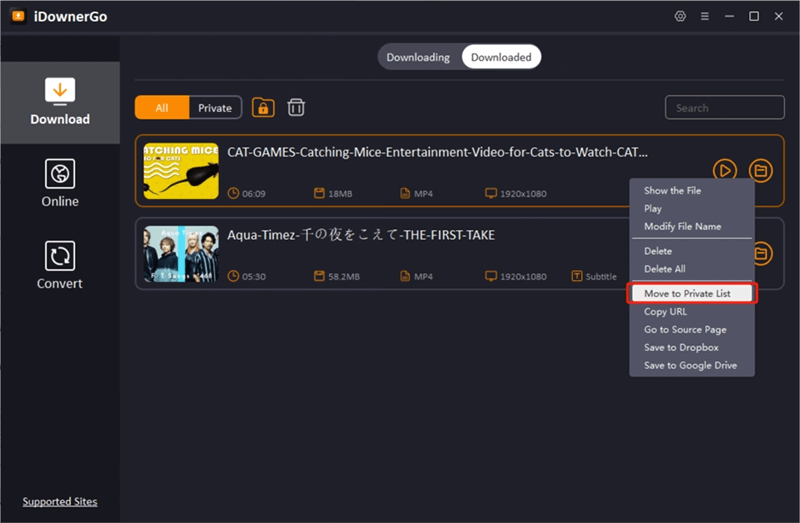
- In this window, enter your password to secure the video. You can also choose to hide the video and its thumbnail. Click the lock icon to complete the process and move the video to the private list.
5. Change Interface Language
iDownerGo supports various languages, such as English, Chinese, Italian, and French. To change the language, click the three-line menu button in the top-right corner of the interface, select the “Languages” tab, and choose your preferred language from the list.

Conclusion
iDownerGo Video Downloader is highly recommended for anyone seeking an efficient tool for downloading and managing videos. As we’ve discussed, iDownerGo offers a range of functionalities that make it a top choice for various downloading needs. Its comprehensive capabilities ensure a smooth and effective video management experience, making it an excellent option for any download requirements.


